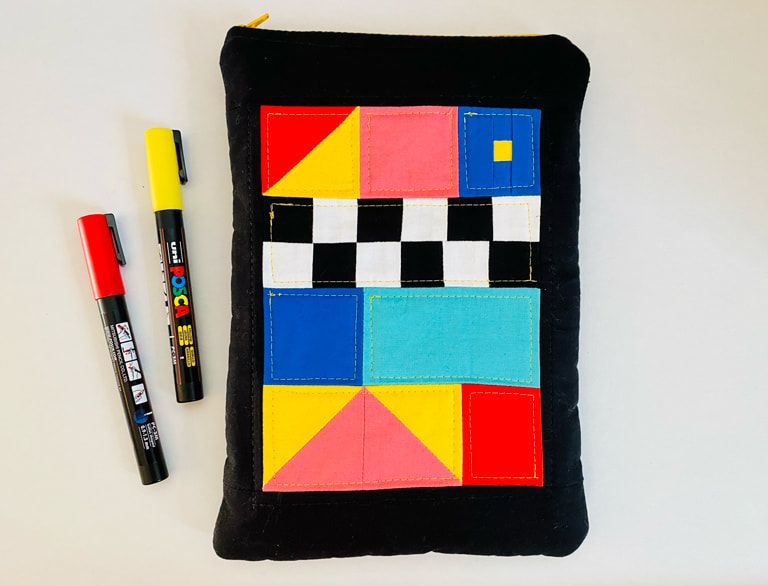
I wanted a protective cover for my sketchbook when oot and aboot. At first I cut some materials for the Creative Maker Case, then got way too intimidated by all the moving parts. I decided to simplify (lol, sort of) by making a quilted zip pouch!
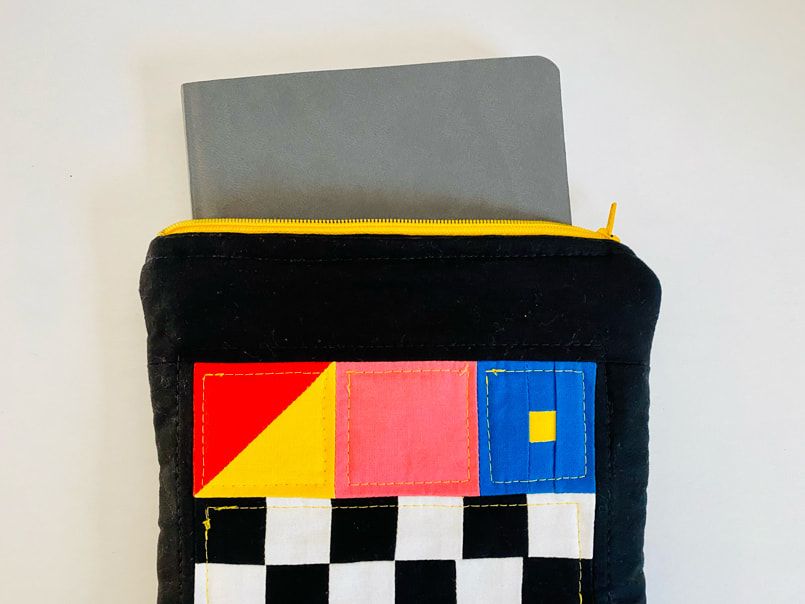
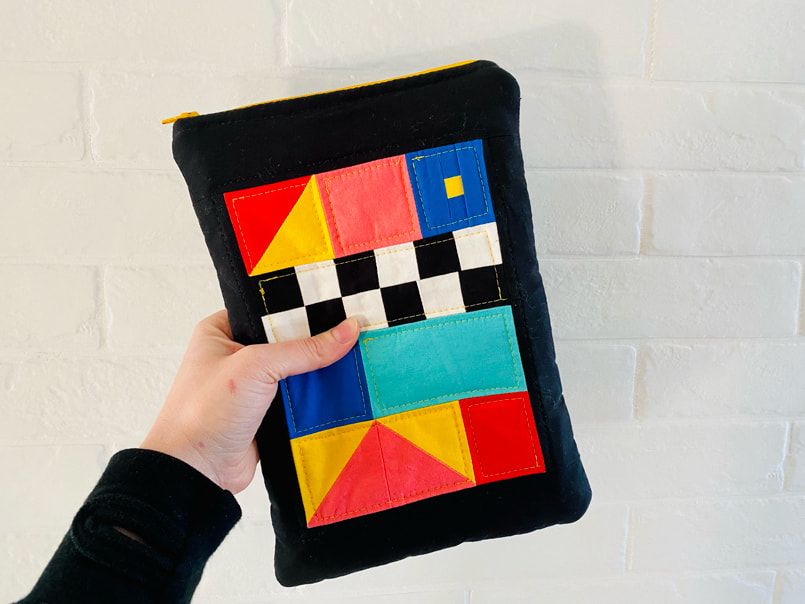
This pouch fits an A5 notebook in comfort and style. It’s a little too risky to jam my sketchbook and Hobonichi in there at the same time, so if I want to bring both along on travel, I may want to make another.
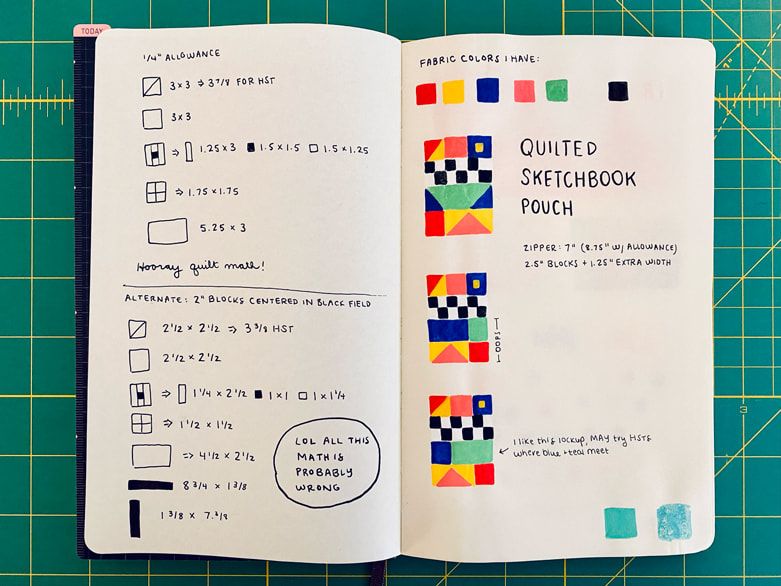
I knew I wanted to go with super bright colors inspired by my Posca paint markers, so I sketched out a couple iterations of the geometric patchwork area.
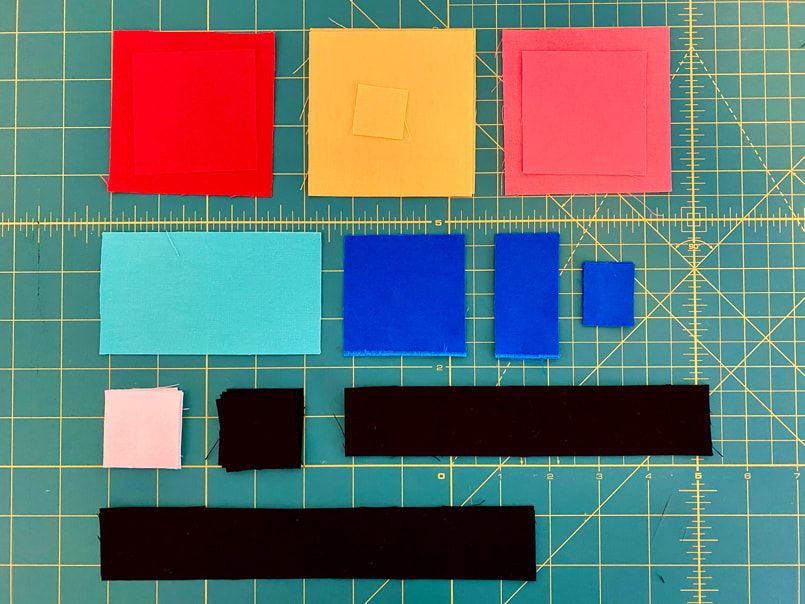
All my colors cut out! It only took, um, a few more months to get everything together.
I did some bad math regarding the black frame around the main patchwork area, so ended up having to recut those pieces to make sure the A5 sketchbook would definitely fit inside.
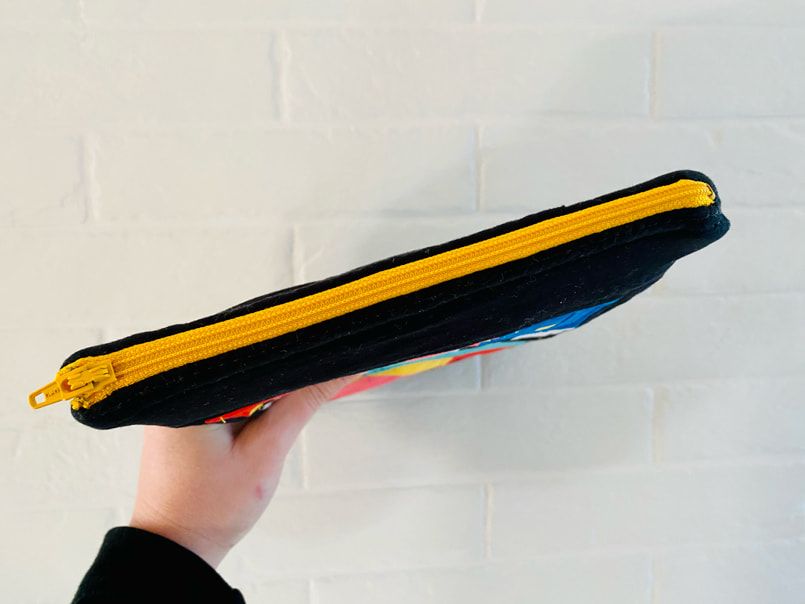

I was honestly a little intimidated by installing the zipper, but actually it wasn’t too bad! The worst part of this was that my sandwich was WAY too thick when I had two outer pieces and the edge of the zipper piece sandwiched together. My machine absolutely refused to go through that. I ended up having to do some pretty sketchy hand sewing for those bits. It’s a minor miracle I did not accidentally injure myself.
All sketchiness aside, MADE Everyday’s zipper pouch tutorial on YouTube made installing the zipper so much easier for me! Her directions are super clear, with the right amount of detail. I might poke around to find other fun tutorials on that channel.
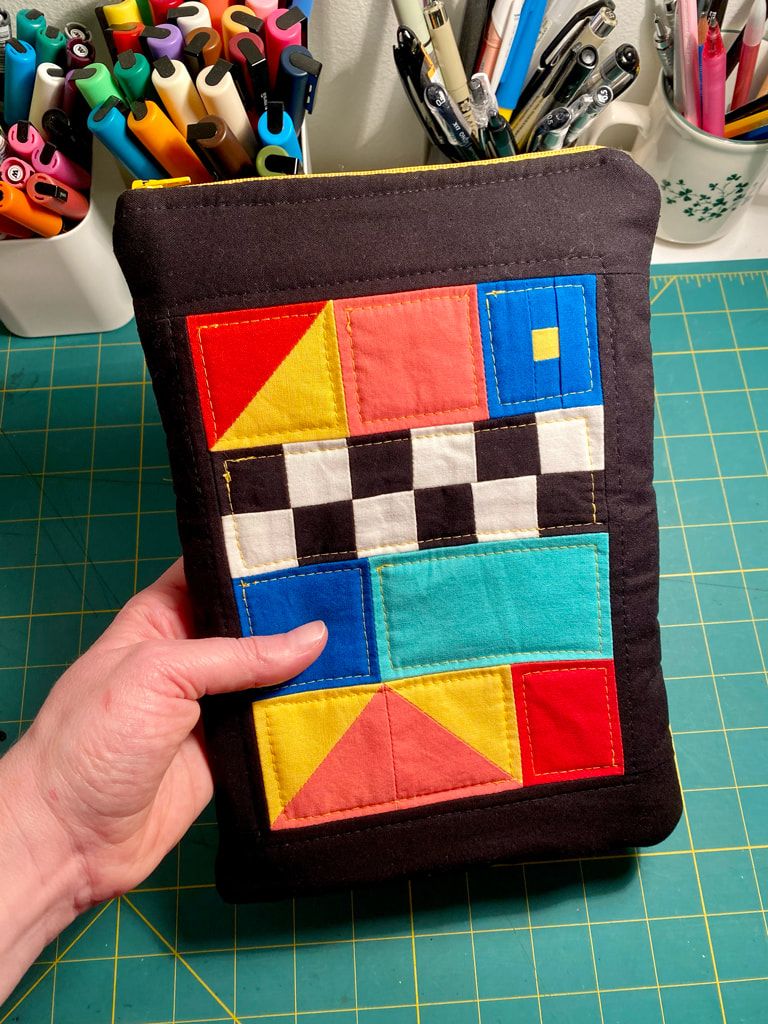
This was also the first project in which I used half-square triangles in my patchwork. I wasn’t sure how well they’d turn out but they ended up being my favorite part! Not too shabby!
All in all, I’m pretty proud of myself for finishing this project, and excited to use my pouch. There’s plenty of mistakes and wonkiness, but that actually makes me more proud of myself—for being proud of myself despite imperfection! That’s a win for me!
Comments
No comments yet on this post.
Add a Comment